测试环境,使用的virtualbox 虚拟机 centos 7.6
社区版OCP 3.3.0-bp2
执行安装命令报错
./ocp_installer.sh install -c config.yaml -i ./ocp-installer.tar.gz -o ./ocp.tar.gz
2025-07-08 10:53:11 - INFO - 1 - [ob_precheck.py:28] - ob precheck using command: sudo /tmp/precheck-5336f5ab-f51b-4e85-b120-bad5ca6715d3.sh -m ob
2025-07-08 10:53:11 - ERROR - 1 - [ob_precheck.py:32] - precheck for ocp on host 192.168.56.80 failed
2025-07-08 10:53:11 - INFO - 1 - [ob_precheck.py:35] - ob precheck result: Machine Role: ob
Peer IP List:
Machine Type: PHY
Inspect Mode: FALSE
check CPU count: 8 > 8 … PASS
check total MEM: 33 GB < 64 GB … EXPECT >= 64 GB … FAIL
TIPS: replace another machine with more MEM
check linux version: CentOS Linux release 7.6.1810 (Core) … PASS
check SELinux status: Disabled … PASS
check account [admin] and home dir, exist … PASS
check service [firewalld]: inactive … PASS
check service [firewalld]: disabled … PASS
SUMMARY OF ISSUES IN PRE-CHECK
check total MEM: 33 GB < 64 GB … EXPECT >= 64 GB … FAIL
TIPS: replace another machine with more MEM
,
2025-07-08 10:53:11 - INFO - 1 - [ob_install.py:82] - clean obd dir
2025-07-08 10:53:11 - INFO - 1 - [ob_install.py:91] - install ob using obd
2025-07-08 10:53:11 - INFO - 1 - [ob_install.py:95] - deploy task with config:obproxy-ce:
depends:
- oceanbase-ce
global:
home_path: /home/admin/obproxy
listen_port: 2883
servers: - 192.168.56.80
oceanbase-ce:
global:
appname: obcluster
data_dir: /data/2
home_path: /home/admin/oceanbase
mysql_port: 2881
redo_dir: /data/log2
root_password: ‘123456’
rpc_port: 2882
server1:
zone: zone1
servers: - ip: 192.168.56.80
name: server1
user:
key_file: ‘’
password: ‘123456’
port: 22
timeout: 10
username: root
2025-07-08 10:53:11 - INFO - 1 - [ob_install.py:100] - deploy obcluster command: obd cluster autodeploy obcluster -c /tmp/ocp_cluster.yaml
2025-07-08 10:53:31 - INFO - 1 - [ob_install.py:104] - deploy obcluster got result Package obproxy-ce-3.2.3 is available.
Package oceanbase-ce-3.1.4 is available.
install obproxy-ce-3.2.3 for local ok
install oceanbase-ce-3.1.4 for local ok
Cluster param config check ok
Open ssh connection ok
Generate obproxy configuration ok
Generate observer configuration ok
obproxy-ce-3.2.3 already installed.
oceanbase-ce-3.1.4 already installed.
±------------------------------------------------------------------------------------------+
| Packages |
±-------------±--------±----------------------±-----------------------------------------+
| Repository | Version | Release | Md5 |
±-------------±--------±----------------------±-----------------------------------------+
| obproxy-ce | 3.2.3 | 2.el7 | bdd299bda2bdf71fd0fd3f155b6a2e39dffd2be1 |
| oceanbase-ce | 3.1.4 | 10000092022071511.el7 | c5cd94f4f190317b6a883c58a26460a506205ce6 |
±-------------±--------±----------------------±-----------------------------------------+
Repository integrity check ok
Parameter check ok
Open ssh connection ok
Remote obproxy-ce-3.2.3-bdd299bda2bdf71fd0fd3f155b6a2e39dffd2be1 repository install ok
Remote obproxy-ce-3.2.3-bdd299bda2bdf71fd0fd3f155b6a2e39dffd2be1 repository lib check ok
Remote oceanbase-ce-3.1.4-c5cd94f4f190317b6a883c58a26460a506205ce6 repository install ok
Remote oceanbase-ce-3.1.4-c5cd94f4f190317b6a883c58a26460a506205ce6 repository lib check ok
Cluster status check ok
Initializes obproxy work home ok
Initializes observer work home ok
obcluster deployed
Get local repositories and plugins ok
Open ssh connection ok
Load cluster param plugin ok
Check before start obproxy ok
Check before start observer x
[WARN] (192.168.56.80) clog and data use the same disk (/data)
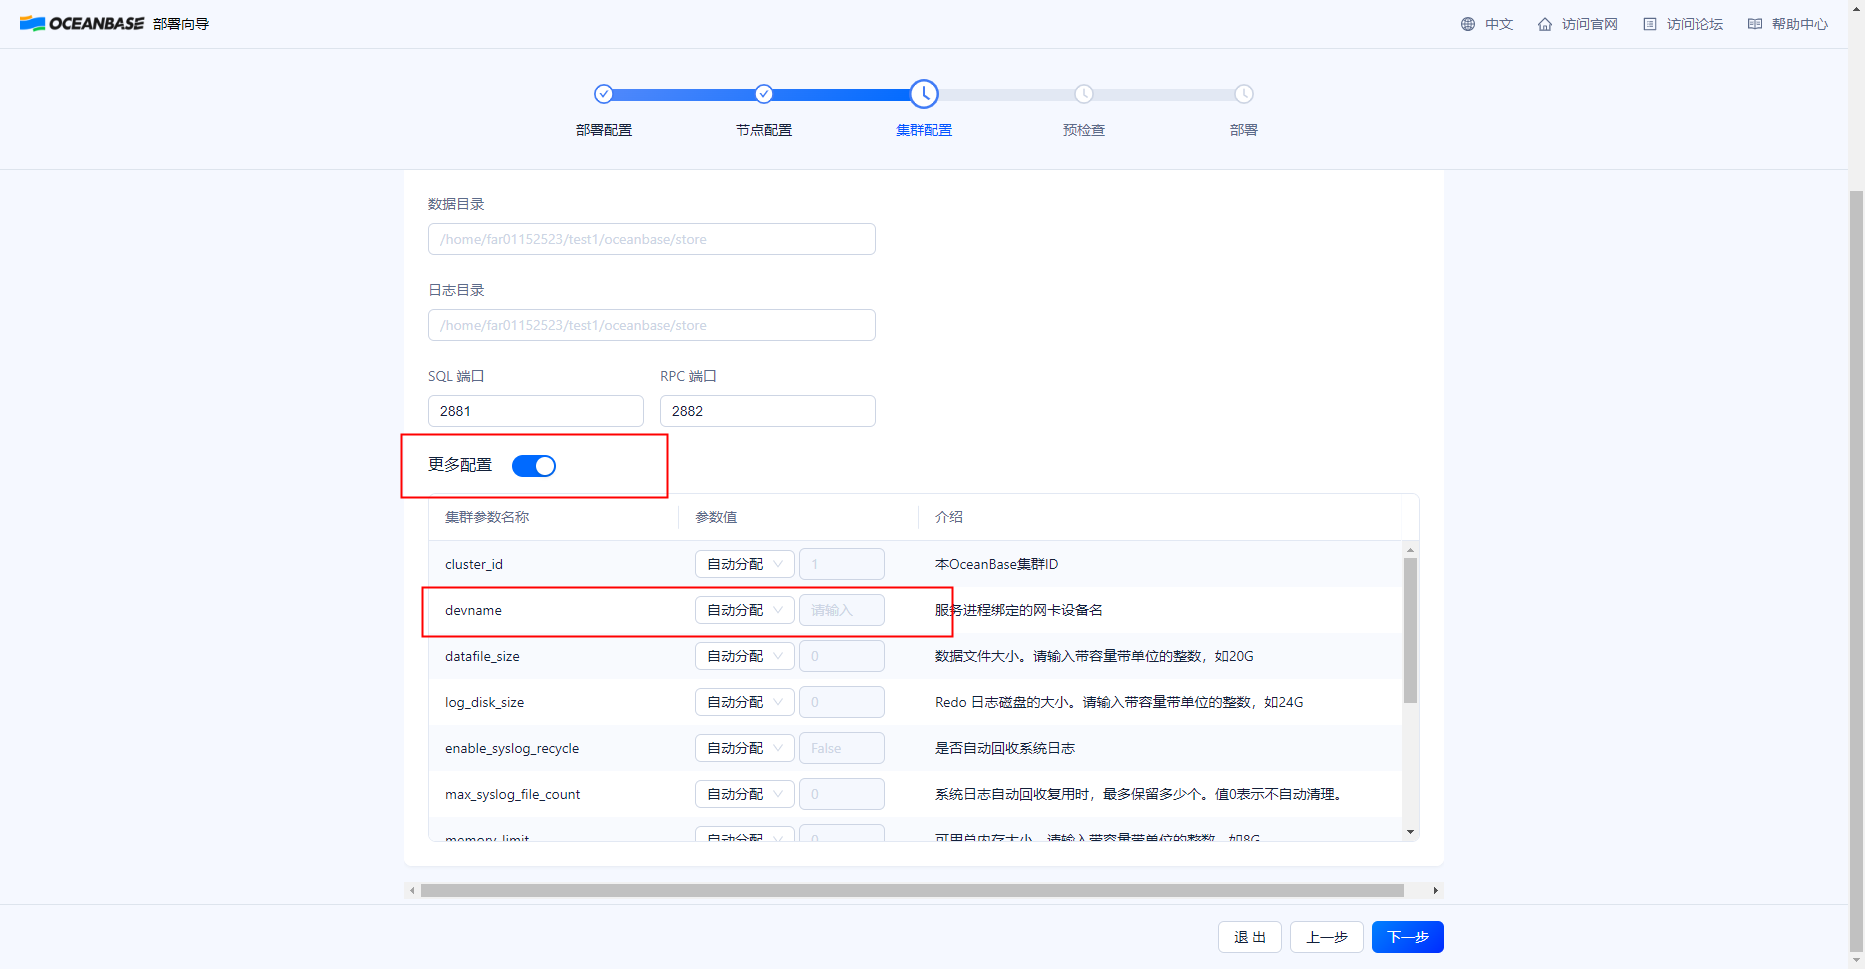
> [ERROR] server1(192.168.56.80) lo fail to ping 192.168.56.80. Please check configuration devname
配置文件如下:
# OCP deploy config
# Note:
# Do not use 127.0.0.1 or hostname as server address
# When a server has both public ip and private ip, if private ip is connectable, use private ip for faster connection
# If a vip is configured, it should be already created and bonded to the right server and port, the installation script won’t do any work with vip maintainance, just use it to connect to the service
# Ignore precheck errors
# It’s recommanded to not ignore precheck errors
precheck_ignore: true
# Create an obcluster as OCP’s metadb
create_metadb_cluster: true
# Clean OCP’s metadb cluster when uninstall
clean_metadb_cluster: true
# Metadb cluster deploy config
ob_cluster:
** name: obcluster**
** home_path: /home/admin/oceanbase**
** root_password: ‘123456’**
** # The directory for data storage, it’s recommanded to use an independent path**
** data_path: /data/2**
** # The directory for clog, ilog, and slog, it’s recommanded to use an independent path.**
** redo_path: /data/log2**
** sql_port: 2881**
** rpc_port: 2882**
** zones:**
** - name: zone1**
** servers:**
** - 192.168.56.80**
** ## custom obd config for obcluster**
** #custom_config:**
** # - key: devname**
** # value: enp0s8**
** # Meta user info**
** meta:**
** tenant: meta_tenant**
** user: meta_user**
** password: meta_password**
** database: meta_database**
** cpu: 2**
** # Memory configs in GB, 4 means 4GB**
** memory: 4**
** # Monitor user info**
** monitor:**
** tenant: monitor_tenant**
** user: monitor_user**
** password: monitor_password**
** database: monitor_database**
** cpu: 2**
** # Memory configs in GB, 8 means 8GB**
** memory: 4**
# Obproxy to connect metadb cluster
obproxy:
** home_path: /home/admin/obproxy**
** port: 2883**
** servers:**
** - 192.168.56.80**
** ## custom config for obproxy**
** # custom_config:**
** # - key: clustername**
** # value: obcluster**
** ## Vip is optional, if vip is not configured, one of obproxy servers’s address will be used**
** # vip:**
** # address: 1.1.1.1**
** # port: 2883**
# Ssh auth config
ssh:
** port: 22**
** user: root**
** # auth method, support password and pubkey**
** auth_method: password**
** timeout: 10**
** password: ‘123456’**
# OCP config
ocp:
** # ocp container’s name**
** name: ‘ocp’**
** # OCP process listen port and log dir on host**
** process:**
** port: 8080**
** log_dir: /tmp/ocp/log**
** servers:**
** - 192.168.56.80**
** # OCP container’s resource**
** resource:**
** cpu: 2**
** # Memory configs in GB, 8 means 8GB**
** memory: 8**
** # Vip is optional, if vip is not configured, one of ocp servers’s address will be used**
** # vip:**
** # address: 1.1.1.1**
** # port: 8080**
** # OCP basic auth config, used when upgrade ocp**
** auth:**
** user: admin**
** password: admin**
** # OCP metadb config, for ocp installation, if “create_metadb_cluster” is configured true, this part will be replaced with the configuration of metadb cluster and obproxy**
** metadb:**
** host: 192.168.56.80**
** port: 2883**
** meta_user: meta_user@meta_tenant#obcluster**
** meta_password: meta_password**
** meta_database: meta_database**
** monitor_user: monitor_user@monitor_tenant#obcluster**
** monitor_password: monitor_password**
** monitor_database: monitor_database**