

1. 前言
本文并不涉及obdiag的诊断操作,仅作为 obdiag 实现MCP可被大模型进行调用的一种尝试。
2. 前期准备
大模型:cursor自带,也可以使用任何支持MCP的模型调用(如vscode的cline组件、cherry studio等等)
调用节点:已安装obdiag,并完成集群配置的节点
本文所有的指导为在cursor环境下的调用案例,其他环境可联系 obdiag
3. 大模型调用obdiag MCP及其实现
3.1. 启动mcp_server
首先需要在obdiag所在节点上启动我们的obdiag mcp_server.py(demo版本)
from fastmcp import FastMCP, Client
import subprocess

# 创建 FastMCP 实例
mcp = FastMCP("OBDiag MCP Server")

def run_obdiag_command(command: str) -> str:
    """
    运行 obdiag 命令并返回结果
    :param command: 完整的 obdiag 命令
    :return: 指令执行的输出结果
    """
    try:
        print(f"Running command: {command}")
        # 使用 subprocess 执行命令
        result = subprocess.run(command, shell=True, text=True, capture_output=True)
        # 返回标准输出或错误输出
        if result.returncode == 0:
            return result.stdout
        else:
            return f"Error: {result.stderr}"
    except Exception as e:
        return f"Exception occurred: {str(e)}"

# 定义一个工具函数,用于调用 obdiag 指令
@mcp.tool()
async def obdiag_check_run() -> str:
    """
    巡检集群,并返回巡检报告
    :return: 指令执行的输出结果
    """
    print("巡检执行")
    full_command = f"obdiag check run"
    return run_obdiag_command(full_command)
# 启动 MCP 服务
if __name__ == "__main__":
    # 检查是否还存在其他的 MCP 实例
    check_old_mcp = subprocess.run("ps -ef | grep obdiag_mcpserver.py | grep -v grep", shell=True, text=True, capture_output=True)
    if check_old_mcp.returncode == 0:
        print("MCP server is already running. Please stop it before starting a new one.")
        exit(1)
    mcp.run(transport="streamable-http", host="0.0.0.0", port=8000, path="/mcp")
3.2. cursor配置MCP
- 点击cursor的配置按钮。以mac 版本的cursor为例,配置按钮在在右上角的齿轮按钮
- 进入MCP的配置页面
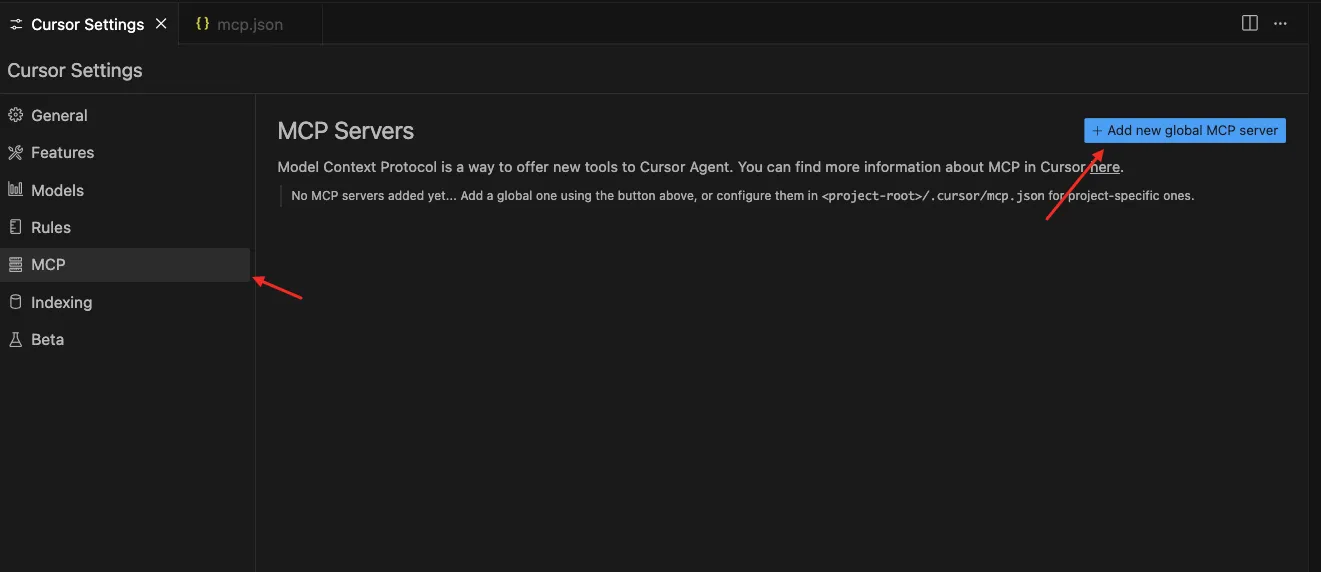
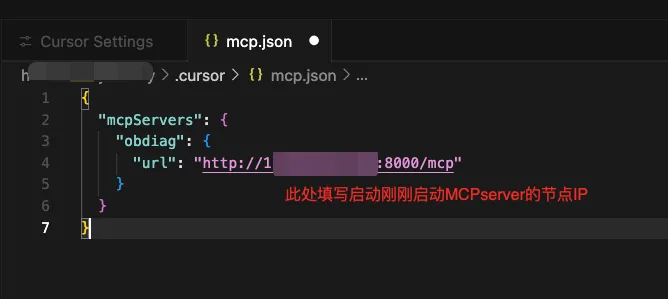
- 填写MCP的相关配置并保存
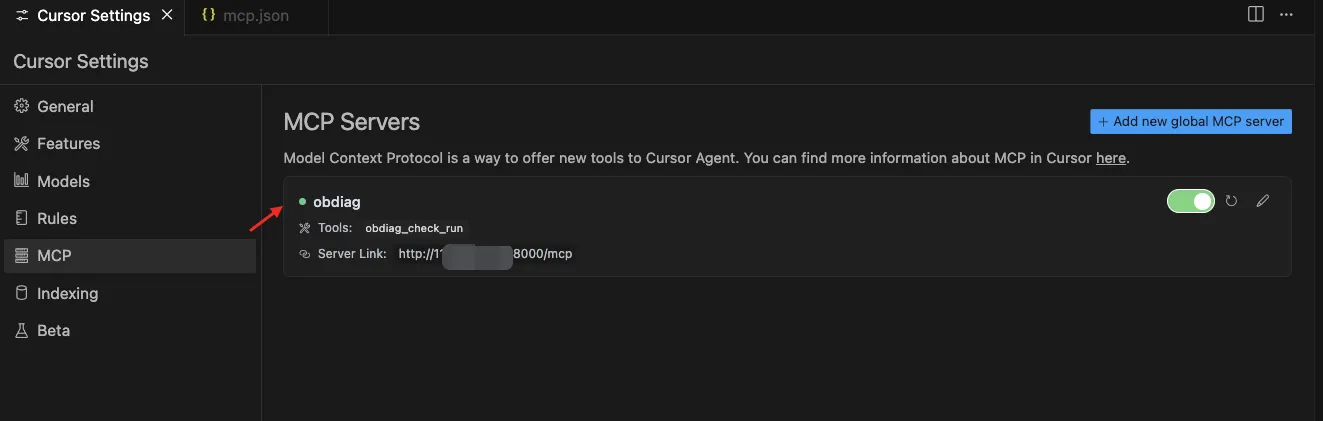
- 确认MCP正常连接,此处为绿色时即可,如不是就需要检查网络问题
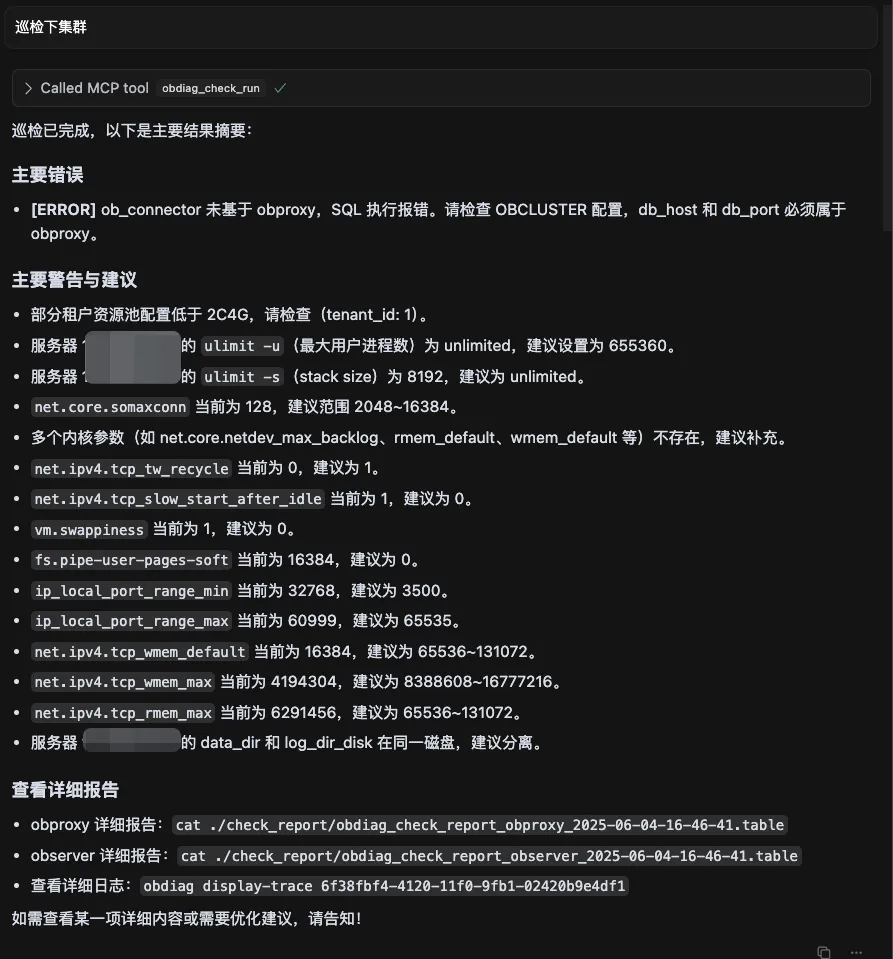
- 调用chat进行使用,这边给的指令为”巡检下集群“”。需要注意的是执行的mcp函数的时候会出现一个需要二次确认的按键,需要点击 Run tool

- 巡检执行结果
4. 共建
obdiag mcp的特性正在开发中,且作为长期迭代项目进行跟进,有兴趣共建的开发者欢迎加入我们。
5. 附录
•obdiag 下载地址: https://www.oceanbase.com/softwarecenter
•obdiag 官方文档: https://www.oceanbase.com/docs/obdiag-cn
•obdiag github地址: https://github.com/oceanbase/oceanbase-diagnostic-tool
•obdiag SIG 营地: https://oceanbase.yuque.com/org-wiki-obtech-vh7w9r/imzr6c